How to Rotate Upload on Power Point Slide
A well-designed layout brings a PowerPoint presentation to life. Images and text should always work together to all-time reverberate the topic and create cohesion. Pictures should be used to underscore and clarify the written content and never distract. The key is to create remainder. Microsoft Office PowerPoint has a wide range of functions to attain this perfectly.
To create rest on a PowerPoint slide, you might want to consider flipping images or text. PowerPoint allows you to flip images, text boxes and shapes both vertically and horizontally. Texts can be flipped upside down or mirrored vertically. Later flipping, you can add finishing touches past selecting a fashion effect. This allows yous to create original and artistic presentations for your audience.
Keep reading to larn how to do the following in PowerPoint:
- Flip images and shapes.
- Alter the orientation of an image.
- Modify the direction of icons, such as arrows.
- Flip text boxes vertically or upside down.
Horizontal flipping, as the name suggests, takes place on the horizontal axis (y centrality). Icons, such as arrows, can indicate in the opposite management. and people in pictures can exist turned to confront the opposite management. This can help frame other content on the slide and focus the audience in a different direction.
Text boxes can also exist flipped vertically or turned upside downwards. This is done along the vertical axis (x axis). Yous can cull to position the title of your presentation vertically to add together some extra visual interest. Or, you may accept a logo with text that y'all want to flip to create a desired effect.
This article gives you detailed step-by-step instructions as well as unproblematic instructions that you can easily do with your mouse. We'll walk you lot through inserting the image all the way to flipping it in PowerPoint.
Flipping a PowerPoint image: This is how you do it
So, you have the perfect portrait epitome for your PowerPoint presentation. But when y'all insert it, you notice that the person in the picture is looking off to the side and not facing the heart of the slide. Don't worry, there's a quick prepare for this. It's time to learn almost flipping in PowerPoint.
Nosotros'll show you how to change the orientation and perspective of a picture. The upside is that you don't take to change the layout of the slide, but the paradigm. With horizontal flipping, you tin do this in just a few steps in PowerPoint. We'll testify you exactly how to do information technology in this tutorial.
Step 1:
Become to the slide in PowerPoint where yous want to insert an image (such as a portrait).
Step 2:
Go to Insert and select Pictures. The Insert Motion-picture show From drop-downward menu allows you to choose your image from: This Device…, Stock Images… and Online Pictures….
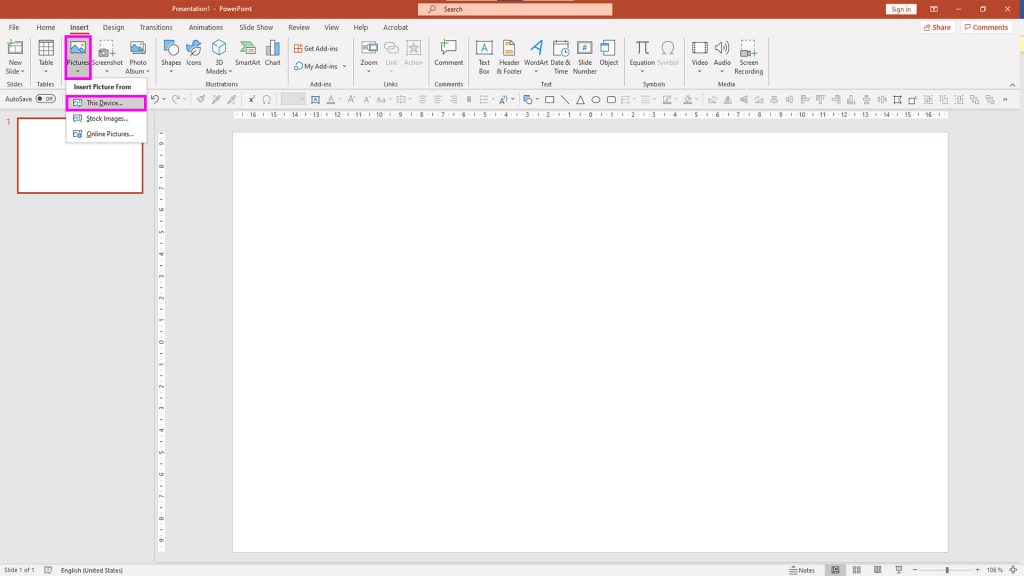
Stride 3:
Once you've inserted your image, the Format Pic… window will open on the correct.
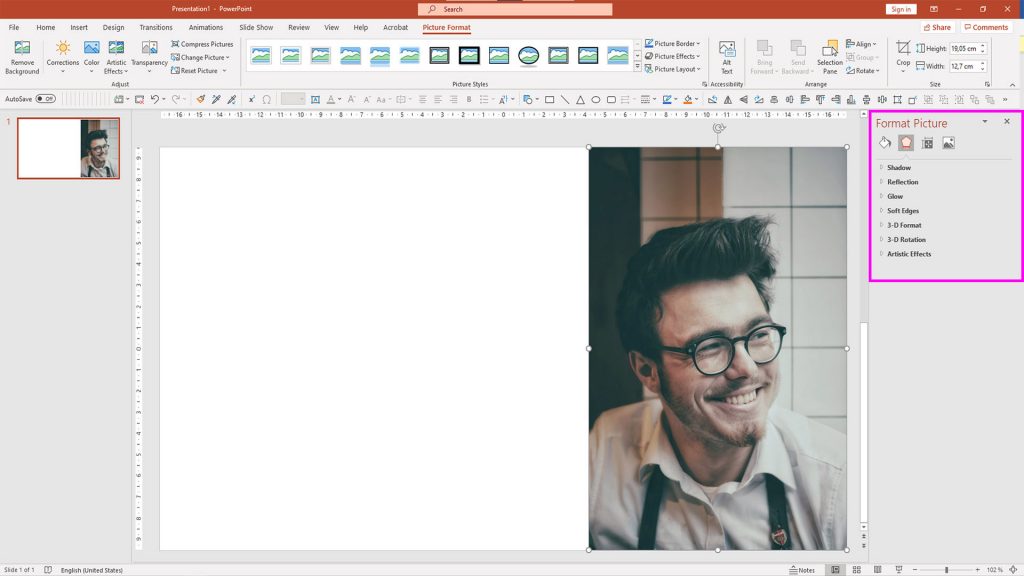
Pace 4:
Left click the image you want to flip. This also works with clipart, shapes and other objects.
Step five:
Get to the Home tab and select Arrange. At present click Rotate under Position Objects.
Step half dozen:
In the new menu, select Flip Horizontal. The image will then be flipped along its horizontal axis.
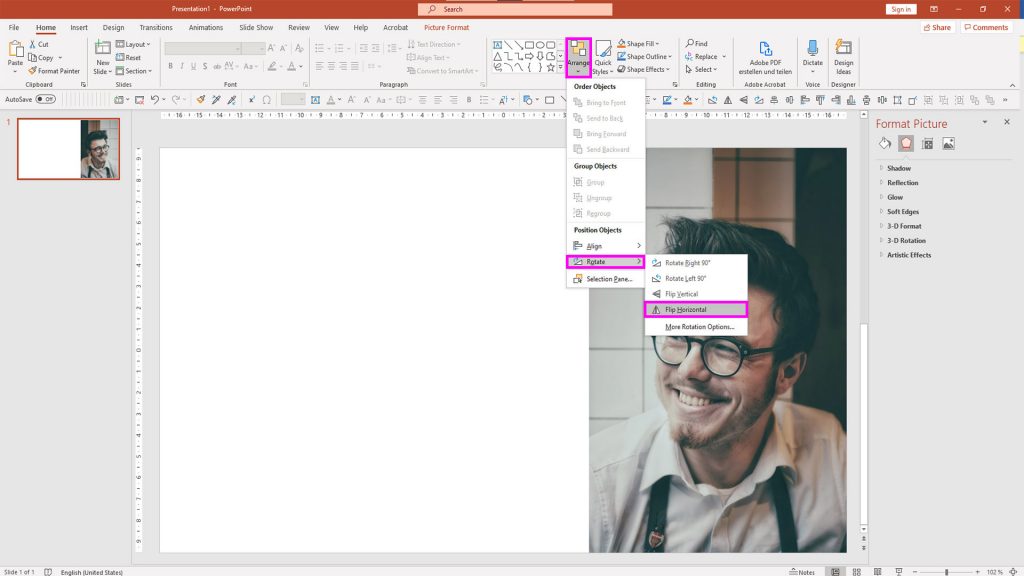
Tip:
Stride 5 besides lets you lot choose to flip the image vertically. This choice is, you guessed it, called Flip Vertical.
How to flip an image with your mouse
Did you know you can flip an paradigm with just your mouse? To flip your image horizontally, simply practise the following:
Step 1:
Left click the image you want to flip.
Stride 2:
Hover your mouse over 1 of the white dots (anchor points) framing the epitome.
Step three:
Concord downwardly on one of these anchor points with your left mouse button.
Stride 4:
To flip the image, drag the point over the image to the other side.
You'll at present accept a horizontal mirroring of your epitome. Vertical flipping can be washed by going to the Picture Format tab and selecting Arrange > Rotate > Flip Vertical. Both methods piece of work with all paradigm types and paradigm formats.
Flip icons, shapes and PowerPoint graphics
Icons are an essential office of and then many PowerPoint presentations. They present relationships and data in a more memorable and compact manner. A simple arrow icon used to represent direction volition exist understood by everyone. Their articulate geometric shapes tin also be used to link concepts together. PowerPoint offers you a wide range of icons and pictograms to choose from. Just they're not available in all directions and alignments and so chances are you lot'll need to flip them.
In the following example, we'll show yous how to flip an arrow horizontally. These steps can of course be used with any other icon.
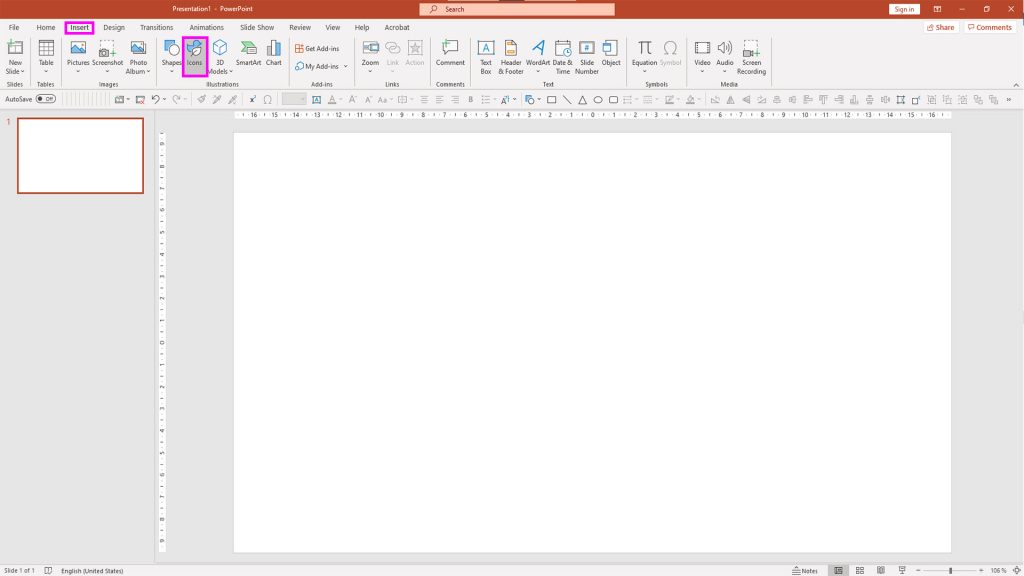
Step 1:
Go to the slide in your PowerPoint presentation where you want to insert an arrow.
Step two:
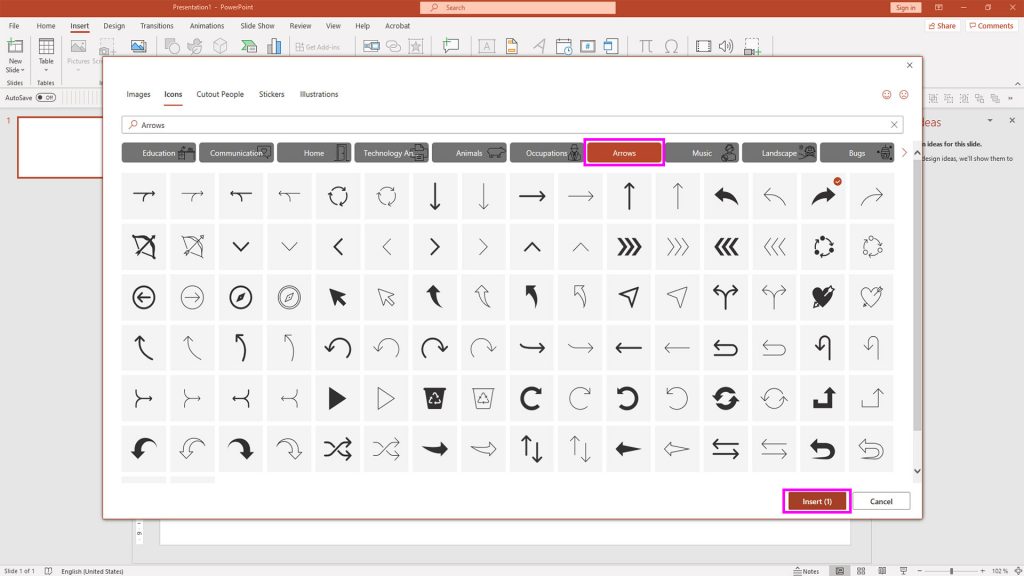
Click on Insert then Icons in the Illustrations group.
Step 3:
This will open a new window with various icon categories.
Pace iv:
Keep scrolling left until you find the Arrows category. Select the arrow you'd like to use and click Insert.
Step v:
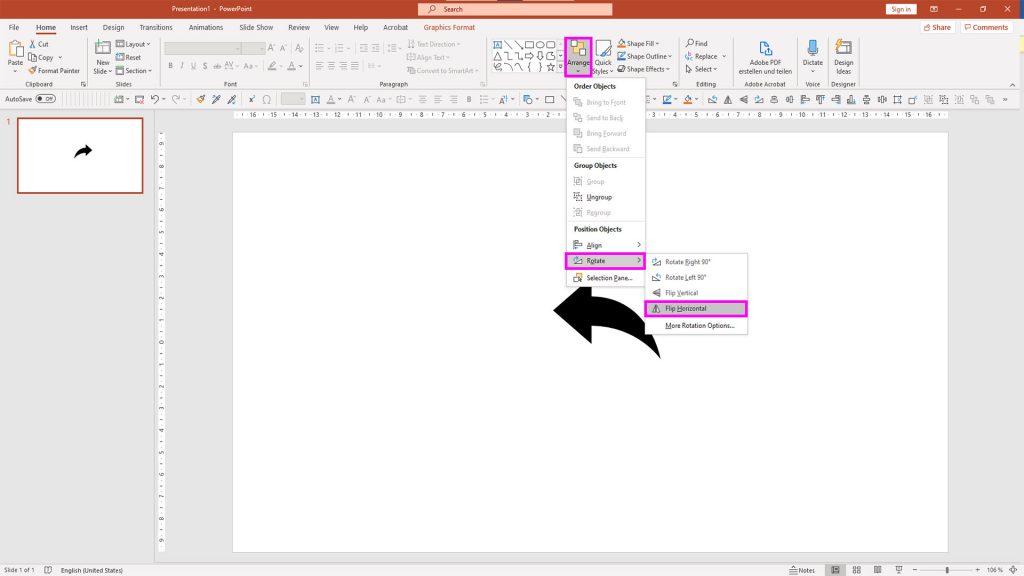
Now it'southward time to change your arrow's direction. First, click on the object.
Step 6:
Go to Abode > Suit > Rotate > Flip Horizontal to point your pointer in the opposite direction. At that place you select "Flip Horizontal" and your pointer points in the opposite direction.
How to flip or rotate PowerPoint text boxes
The kickoff thing you need to know is that text boxes in PowerPoint tin can simply be mirrored vertically, not horizontally. Even so, you tin rotate the box upside downward.
No matter how you lot want to flip or rotate your text, yous start demand a text box. Text boxes accept a visible blackness frame and colour fill. We'll hash out how you can remove both this frame and fill afterwards you've rotated or flipped your box.
How to flip text in PowerPoint
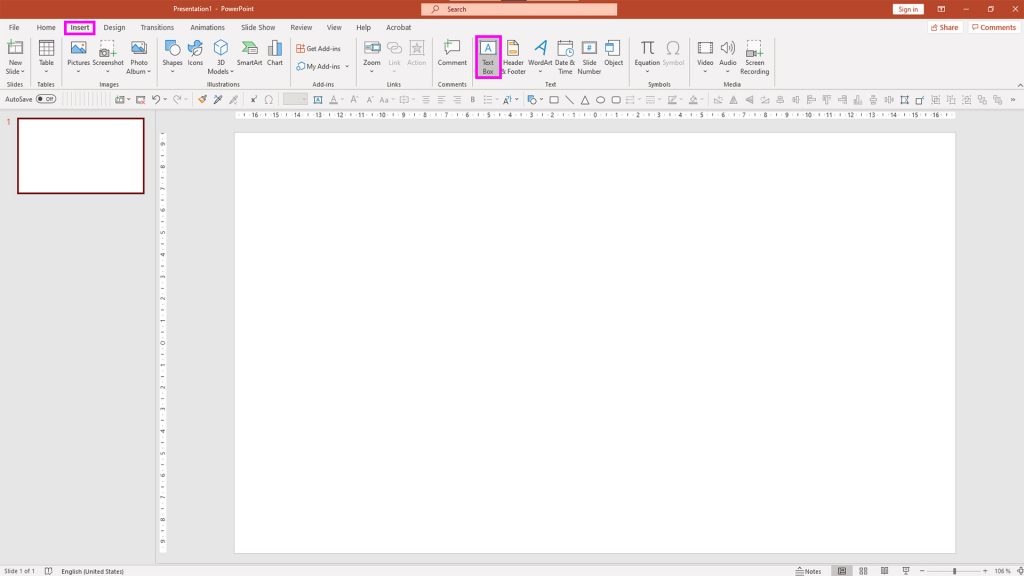
Step 1:
Insert a text box where you need it. To exercise this, Go to Insert > Text Box then elevate your mouse on the slide to create the box. Enter your text and the box is gear up for formatting.
Step ii:
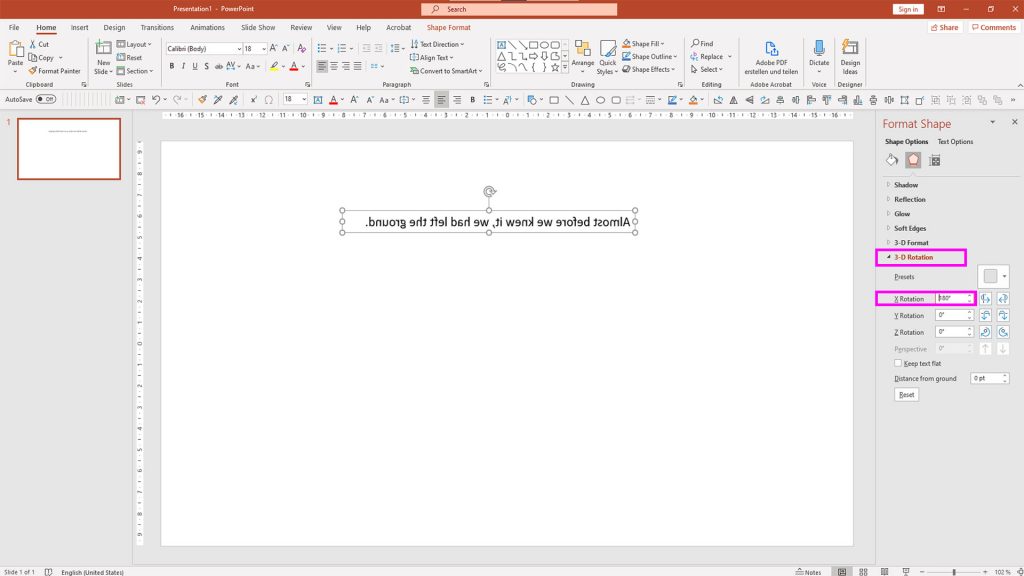
Right click your shape and select Format Shape…. This will open a side console where y'all'll now select Effects (the 2d icon).

Footstep 3:
Go to 3D Rotation > X Rotation and enter 180. The text will now be mirrored.
Step iv:
Extra choice:
If your text box has a background color fill, you tin can easily remove information technology. The best way to practice this is by selecting the commencement icon (Fill & Line) in the Format Shape console (see above). There you'll see several options, including No fill. To remove the text box frame, click Line > No line.
Just like with images, yous tin also flip text boxes using only your mouse. To practice this, click on your text box, motility your mouse to an ballast point and agree down your mouse button to drag that anchor signal to the opposite side.
Turn text upside down in PowerPoint
Text can also be turned upside downward. This is handy if you want to make folding, double-sided printouts or place cards.
In this section you'll learn to flip text boxes 180 degrees. Before y'all get started, yous nevertheless need to insert your text into a text box. Here'due south how to turn your text upside down:
Step ane:
Click the text box that you want to plough upside down.
Step 2:
Go to the Shape Format and click Arrange. Now select Rotate.
Stride 3:
In the drop-down carte du jour, y'all'll find More Rotation Options….
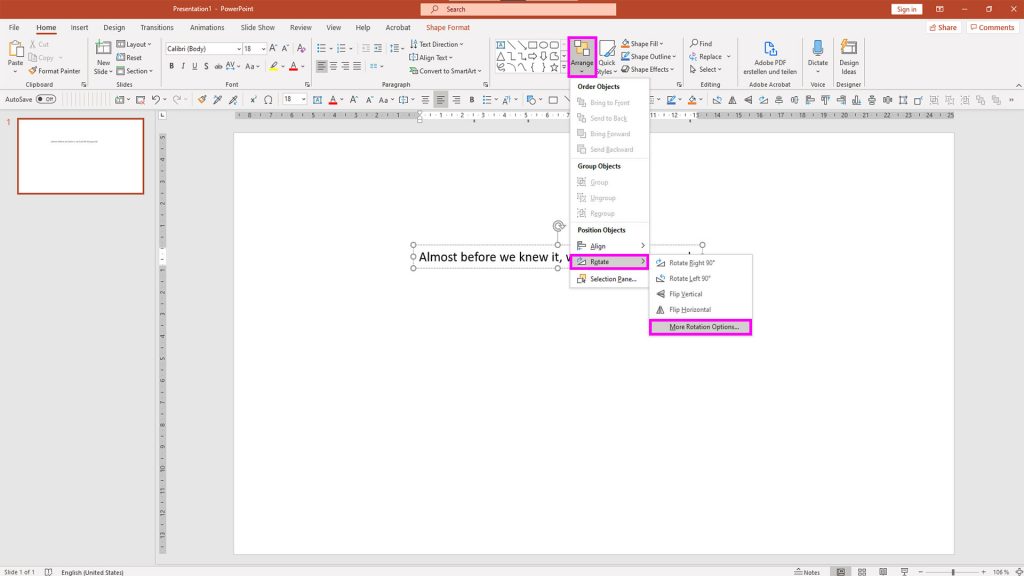
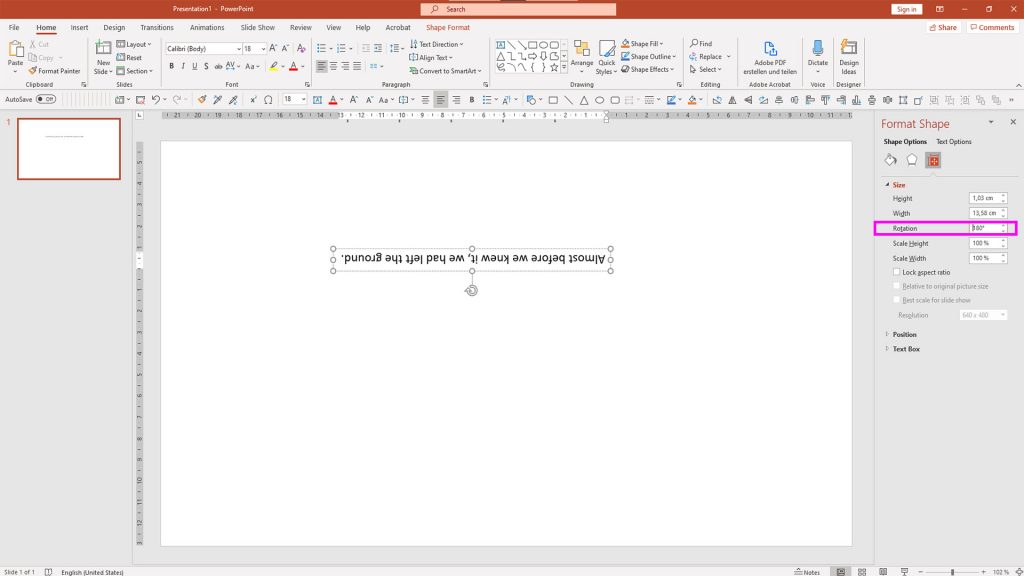
Step 4:
A side console will now open where you tin can enter a value in the Rotation field. To turn your text upside down, enter 180. Or get back to Rotate and click Rotate Right ninety° twice.
Tip:
Yous tin can also right click your text box and select Format Shape…. This will open a side console where you lot tin click the third icon (Size & Properties) and enter your rotation value in the Rotation field.
Now you know how to flip images, shapes, icons and text boxes horizontally. You know how to brand portrait photos will face into the slide and arrows point in the right management. Yous tin do all of this by using the Format Shape… option. Alternatively, you lot can but employ your mouse. Text boxes can also exist flipped vertically or turned upside down allowing y'all to create double-sided printouts and place cards hands.

Source: https://blog.presentationload.com/powerpoint-flip-images-text-boxes-and-shapes/
0 Response to "How to Rotate Upload on Power Point Slide"
Post a Comment